
Berry Cheesecake
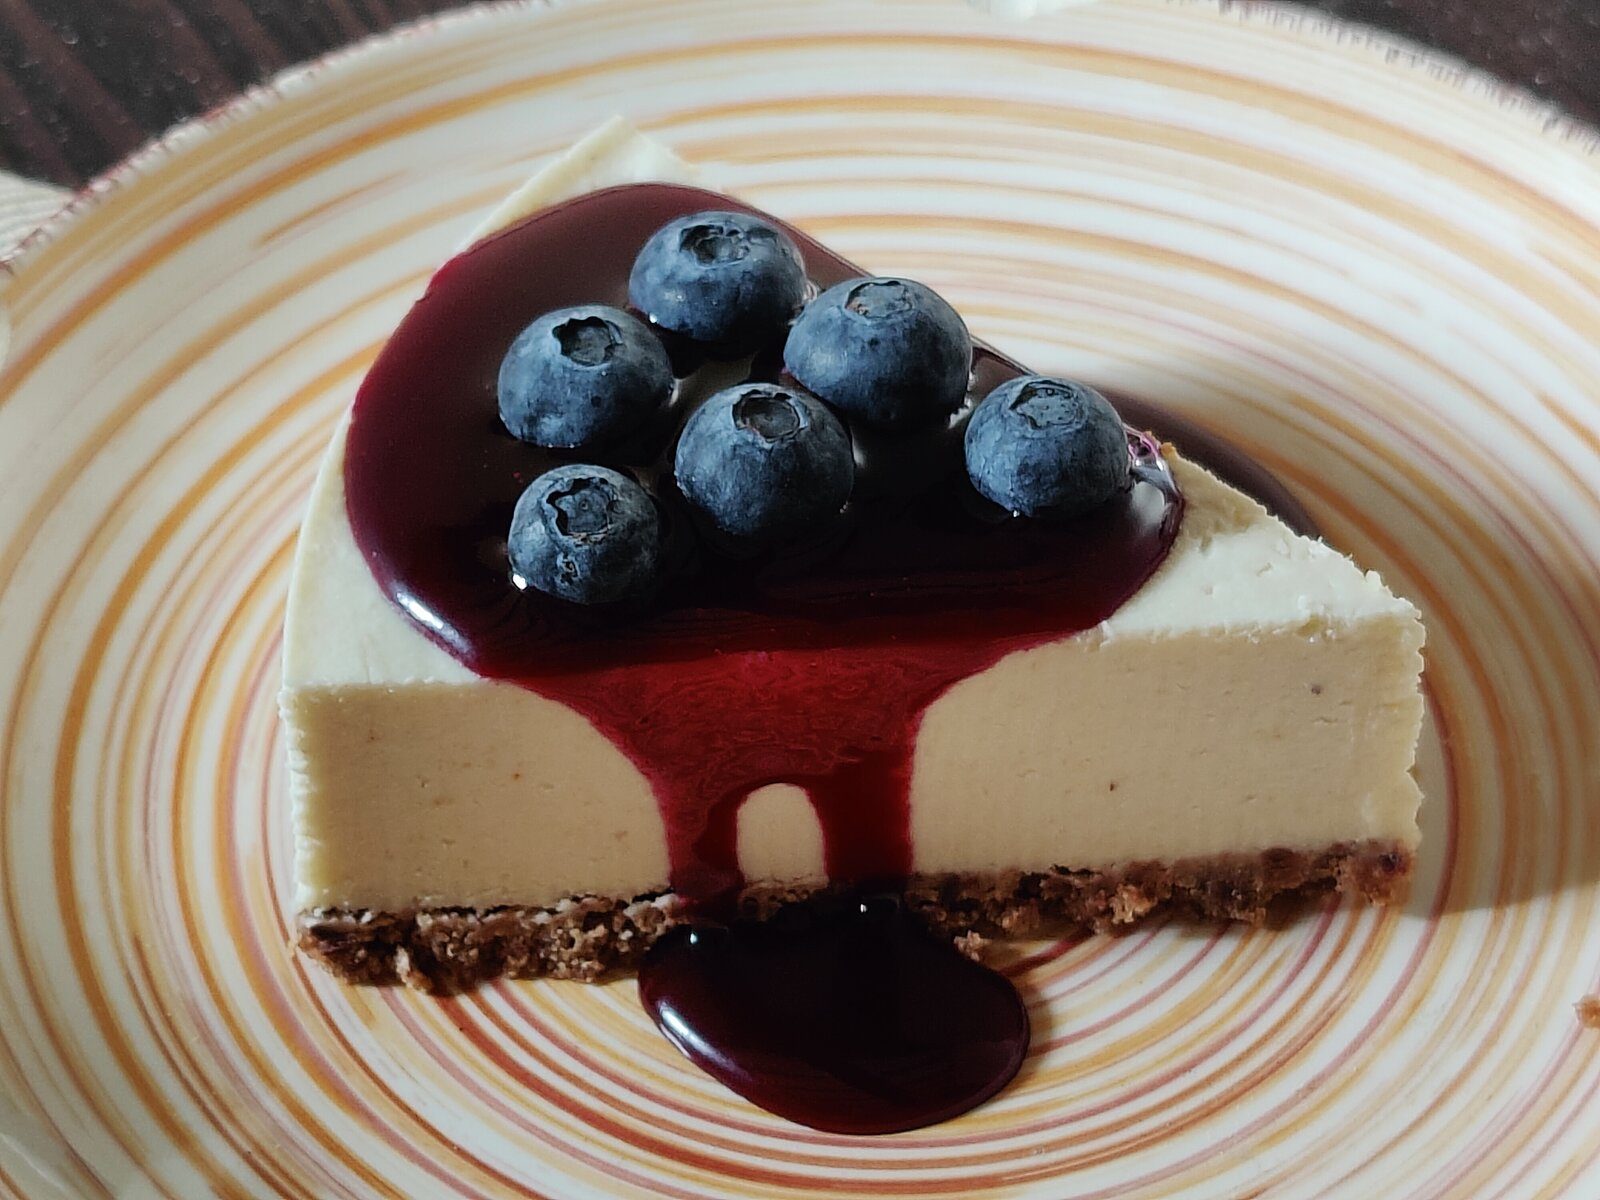
A creamy cashew cheesecake with fresh blueberries and a berry coulis — fully plant-based and no-bake.
Ingredients
Base
- 110 g vegan shortbread biscuits
- 35 g dark chocolate
- 48 g Vallé Pasticceria (or a block-style vegan butter)
Cashew «mascarpone»
- 250 g raw cashews (soaked 6-8 h, or 1 h in boiling water)
- 32 g lemon juice
- 55 g melted coconut oil
- 30 g water
Filling
- 200 g vegan cream cheese
- 80 g icing sugar
- 1.5 g fine salt
- 100 g vegan whippable cream (e.g. Hoplà Veg, Soyatoo, Oatly Whippable)
- 2.5 g powdered agar agar
Berry syrup
- 450 g frozen mixed berries
- 1 pinch of fine salt
- 56 g sugar
- 62 g glucose syrup
- 7 g lemon juice
Note. The sugar, glucose and lemon above are estimates based on the expected yield of berry juice: they recalculate themselves once you enter, in step 2, the juice you actually got.
Glucose isn't a convenience here, it's what gives the syrup its character. Weight for weight it binds far more water than sucrose and sweetens less, which is why there is more of it here than in most recipes.
To decorate
- 100 g fresh blueberries (roughly, enough to cover the top)
- mint leaves (a few, optional)
Method
Note. Pan conversion: the quantities are for a 20 cm springform pan. For a different size — say a 26 cm one — use the calculator above: set the diameter and the servings and all quantities adjust themselves.
-
Soaking the cashews (the night before)
- Soak the raw cashews (250 g) in cold water, covered, for 6-8 hours (or 1 hour in boiling water).
-
Draining the juice (at least 3-4 hours ahead)
- Put the frozen berries (450 g) with the pinch of salt in a microwave-safe bowl and heat at full power, stopping every two minutes to crush them with a spoon as they soften. About 8 minutes is enough: they’re ready when they break up with little resistance under the spoon and a good pool of liquid has gathered at the bottom. There’s no need to get them hot — extra heat only degrades the colour.
- Or use a saucepan over medium-low heat for 8-10 minutes, crushing the same way and stopping at the same sign.
- Don’t blend them: it would create very fine particles that pass through any sieve and leave the juice cloudy.
- Pour into a fine-mesh sieve set over a bowl and let it drain in the fridge.
- To go much faster, cover the pulp with a sheet of cling film and rest a weight on top. In twenty minutes or so you get as much juice as a whole night would have given, and it stays clear: the pulp compacted under the weight works as an extra filter and keeps the juice from clouding. Without a weight it takes several hours, and the yield stops lower.
- Don’t press with a spatula and don’t rub the pulp against the mesh: rubbing pushes it through the sieve and the juice goes cloudy. That’s the opposite of a static press, where the compression is vertical and even.
- With the weight the yield gets to around 55% of the starting weight, against 45% from gravity alone. The pulp left in the sieve isn’t waste: it’s lovely in yoghurt or on a slice of bread.
- You want about 250 g of juice, around 55% of the weight of the fruit. Yields vary: weigh yours and write it here, and the rest of the recipe works itself out. g
-
Prepare the pan (optional)
- You can line the base and sides of the springform pan with parchment paper (a circle for the base, a strip for the side): about 60 cm of strip for the 20 cm pan, 80 cm for the 26 cm one.
- The strip around the side gives a cleaner edge and an easier release. The circle on the base matters mostly if you want to lift the cake off the base easily to put it on a serving plate.
- You can hold the ring closed from the outside, not touching the cake, with masking tape.

-
Base
- In a food processor, grind the biscuits (110 g) and the chopped chocolate (35 g) to a fine powder.
- Add the Vallé Pasticceria (the 48 g) at room temperature, cubed, and keep blending: the friction is enough to work it in to a sandy mixture.
- Press into the base of the pan, compacting well with a meat mallet or a spoon. Chill for 30 minutes.
- No need to wash the processor and blade: wipe them with kitchen paper, you’ll want them again for the mascarpone.

-
Cashew «mascarpone»
- Drain and rinse the soaked cashews well.
- Blend at high speed with the lemon juice (32 g), the melted coconut oil (the 55 g) and the water (30 g), stopping often to scrape down the sides: it’s a heavy load and the mixture climbs the walls.
- Blend for at least 3-4 minutes in total, until completely smooth (if you can feel any grit on your palate, keep going).
-
Filling — the cream
- In the same processor, add the vegan cream cheese (200 g), the icing sugar (80 g) and the salt (1.5 g), and blend until smooth.
- Taste it now: on its own it should seem slightly too sweet. The tart syrup on the plate brings it back into balance, and at this point you can still adjust.
- Leave everything in the jug and keep the pan with the base within reach: the next step goes without pauses.
-
Filling — agar agar and assembly
- In a small saucepan combine the vegan whippable cream (the 100 g) and the agar agar (2.5 g).
- Whisk, bring to a gentle boil and keep it simmering for 2 minutes (if it doesn’t boil enough, it won’t set).
- If your agar is years old or from an unfamiliar brand, you can test it first: 1 g in 100 ml water, 1 minute at a boil, 10 minutes in the fridge. If it stays soft, increase the dose by 50%; if it doesn’t set at all, discard it.
- Take it off the heat and pour it straight into the processor in a thin stream, mixing to avoid lumps. Don’t wait for it to cool: agar starts setting below 40°, and with everything else ready you can work it while it’s still very hot.
- Pour it onto the chilled base right away. To level it, set the pan on the worktop and slide it back and forth in short, quick movements: the surface settles itself and the bubbles rise. Have faith: it isn’t too liquid! 😊
- Chill for at least 6 hours (overnight is better). Cover with cling film or a dome: an uncovered filling dries and forms a skin.
- If you want an even smoother top, run a flat spatula over it as it sets. It isn’t essential.

Photo from the caramel cheesecake: this filling, without peanut butter, comes out paler. -
Coulis — reduction
- Weigh the empty saucepan and note the tare: during the reduction it lets you weigh without decanting. g
- Put in the juice (250 g) with the sugar (56 g) and the glucose syrup (62 g), for a total of about 368 g.
- Use the widest pan you have: what counts here is the surface area for evaporation. In a large, wide pan the timings shorten considerably.
- Bring to a lively boil, with the whole surface moving. It shouldn’t boil over, but it shouldn’t just simmer either: too low a heat and you never get there. In a small saucepan it takes 20 to 22 minutes.
- Stir now and then, and more often over the last thirty grams, when the concentration rises and the bottom starts to catch. Towards the end, lower the heat and keep the scale within reach.
- Reduce to 197 g, that is 197 (+ tare) g including the saucepan, then take it off the heat.
- Off the heat, stir in the lemon juice (7 g): it revives the colour and balances the sweetness.
- Pour into a jar and let it cool in the fridge. It will set into a jelly, and that’s expected: berries contain pectin, which passes into the juice along with the colour and forms a gel at this concentration.
- Once cold, stir it hard with a spoon to break the gel, and loosen it with about 15 g of water to the consistency you want. You’ll end up with around 212 g. Once a pectin gel has been broken mechanically it doesn’t re-form the same way, and what’s left is a thick, clinging syrup even straight from the fridge — which you don’t get from reducing alone.
- To judge the consistency, put a teaspoon on a saucer and tilt it: it should run slowly, leaving a trail. Do this with the syrup cold from the fridge, which is how you’ll serve it. If it’s too thick, add water a spoonful at a time.
- If it sets again after a few days, another stir is all it takes.
-
Decorating and serving
- Open the springform and peel the parchment strip off the side.
- Just before serving, spoon a generous amount of syrup over each plated slice, letting it run down the side.
- Arrange the fresh blueberries (100 g) on the coulis, and the mint leaves if you’re using them.
KeepsCovered, in the fridge: 3-4 days. The syrup, separately in a closed jar, a week.